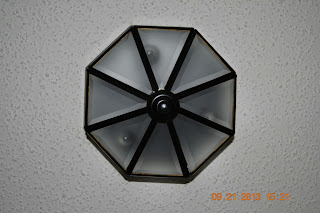
I had this ugly light at the back door. You know, the tacky brass ones that were used a few years ago? I detested the thing. I had some experience using Rustoleum's Specialty Frosted Glass spray (see that blog here: http://debbiesopenwindow.blogspot.com/2012/08/window-privacy-with-style.html) so I decided to use it to update the light instead of buying a new one. I used satin black spray paint on the brass. After letting it dry for a week, I masked it off and sprayed the frosted glass treatment on the glass. I love how it turned out. Stay tuned, I am spray bombing everything lately.
Before
After
Debbie's Open Window
Saturday, September 21, 2013
Tuesday, July 9, 2013
Tell your story with jewelry! Shop now at http://t.co/Hy0jX80Sbn.
— Debbie Beck (@DebbieBeck3) July 9, 2013
Wounded Warrior Project
Learn about how technology is helping #woundedwarriors with #PTSD and #TBI from @T2health --> http://t.co/4k0UVx1JHu.
— DCoE PH & TBI (@DCoEPage) July 9, 2013
Saturday, March 9, 2013
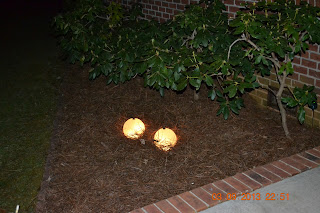
I was browsing through my local Goodwill store and came upon these. Pretty ugly, huh? Yeah, that's what I thought.
Then a light bulb went off in my head. Sorry, ya know I had to say that, right??!! Anyway, I bought the hideous light. I took the chain and electrical parts off - they went into the scrap metal recycle pile. Then I washed the years of dirt and whatever else that stuff was that was in the globes. Next, I placed indoor/outdoor lights inside and placed them in my yard beside the patio.
Nice for mood lighting for those cool spring nights on the patio, don't ya think?! Happy shopping at your Goodwill or thrift store!! See ya soon with another project!
Thursday, September 6, 2012
Wednesday, August 29, 2012
From Tree to Bench
We had a huge tree to fall down on our land. It was big. Big, big. Huge. Enormous. Did I mention it was big? It wouldn't fit in most sawmills in our area. After exploring several avenues for getting it cut, the better half found someone who could get it cut down to make a bench out of it.
I didn't get a pic of it before it was cut for us but here is a pic of it as I was applying Cabot's Australian Timber Oil on the bark side.
Here is a pic of the sanded side (seat) before I applied the timber oil to it.
I didn't get a pic of it before it was cut for us but here is a pic of it as I was applying Cabot's Australian Timber Oil on the bark side.
Here is a pic of the sanded side (seat) before I applied the timber oil to it.
Here you can see the difference from the end, which has been coated in the oil, and the top, which is about to be covered.
Cabot's Australian Timber Oil
As soon as it cures properly I will post pictures of the finished bench in the yard!
Ok, as promised here are some pictures of the finished bench. I let it cure while I did some "research" at the beach (wink wink)!
Of course my helper didn't want to miss a photo opportunity!
I hope you like how it turned out. It was a learning experience for me. I am loving how it looks in the front yard.
Stay tuned for the next project! God Bless!
Subscribe to:
Comments (Atom)


